Matikan Autorun pada USB dan CDROM

file autorun.inf seringkali digunakan oleh virusmaker (pembuat virus) untuk menyebarkan virus yang dibuatnya, pada artikel kali ini saya mau memberikan tips sederhana bagaimana cara mematikan autorun pada usb dan cd rom.

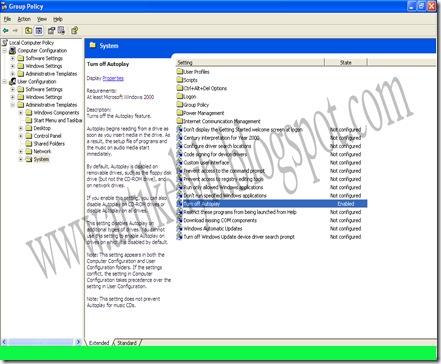
  • Start > Run > ketik gpedit.msc
  • Maka akan muncul jendela, Group policy
  • Kemudian pilih User Configuration > Administrative Templates > System
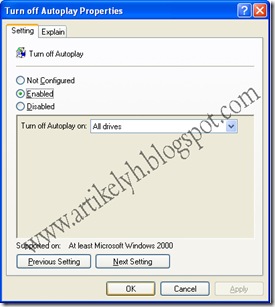
  • Cari Turn off Autoplay

untitled copy2

  • Klik 2 kali, pada jendela berikutnya berikan setting berikut

1 copy Semoga tips sederhana mematikan autorun bermanfaat.

Salam.

SELENGKAPNYA >>

kumpulan Video tutorial perbaikan notebook dan netbook


Acer 5920g Laptop Assembly/Repair [HD]

Acer Laptop Repair

How to replace laptop lcd / How to replace laptop screen DELL

HP Pavilion Laptop Broken DC Power Jack repair

acer aspire 5920 screen flicker repair

How to Upgrade CPU of an Acer Aspire 4315 - Step by Step

Acer Aspire 3050 3680 5050 5570 Power Board w/ dc jack & usb replace repair

SELENGKAPNYA >>

How to remove LCD screen and inverter board from Acer Aspire 5580, 5570, 3680

This video explains how to remove and replace the LCD screen and inverter board in Acer Aspire 5580, 5570 and 3680 series laptops.

It’s not necessary to separate the display panel from the laptop base in order to remove the LCD and inverter. You can do it while the display is still attached to the base.

REMOVING SCREEN AND INVERTER WITHOUT REMOVING DISPLAY PANEL

1. Turn off the laptop and remove the battery.

2. Remove 8 screws securing the display bezel (time point 0:08 in the video).

3. Remove the display bezel (time point 0:20 in the video).

4. Remove the inverter board (time point 0:30 in the video).

5. Remove screws securing the LCD screen assembly to the display cover (time poing 0:43).

Now it’s getting differnt.

6. Separate the LCD screen assembly from the display cover and disconnect the video cable on the back of the LCD screen (time 1:44 in the video).

NOTE: At this point the LCD screen assembly is still attached to the laptop base.

7. Remove screws securing the LCD screen to the moutning brackets. Two screws on each side of the screen (time 1:17 in the video).

8. Replace the removed LCD screen with a new one if needed. You can find a new screen for Acer Aspire laptops here.

For complete laptop disassembly instructins please refer to this service manual or here for Acer Aspire 3680, 5570, 5580 laptops. It’s a 4.6MB pdf file and might take some time to download.

source : http://www.insidemylaptop.com

Static electricity can kill your laptop. I recommend wearing an anti-static wrist strap while working with internal parts of your laptop.

SELENGKAPNYA >>

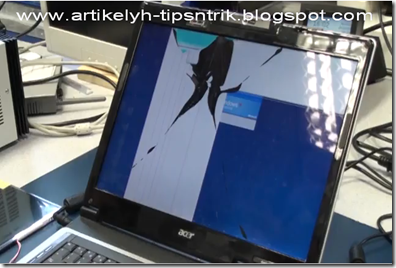
How to replace damaged LCD screen in Acer Aspire 5670 or 5620 laptop


untitled

This guide explains how to remove a damaged LCD screen from an Acer Aspire 5670 or Aspire 5620 laptop.

All following disassembly steps should be the same or very similar for Acer TravelMate 4210/4270/4670 series laptops. If this guide works for any other model, please mention the model number in the comments below.

You can save hundreds of dollars by replacing a damaged or failed LCD screen yourself but you have to be very careful. Proceed on your own risk.

Let’s go through the disassembly process step-by-step. Turn off the laptop, unplug the AC adapter and remove the battery. Make sure the laptop is completely off.

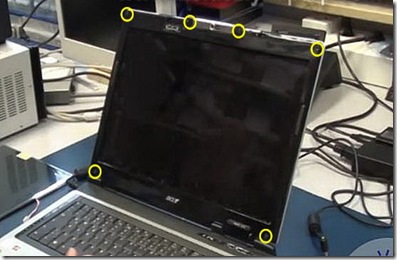
STEP 1.

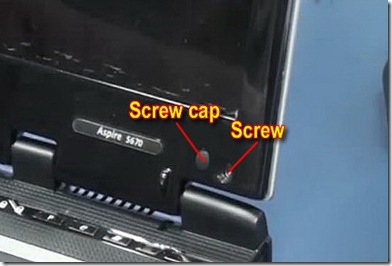
There are six screw covers (caps) on the screen bezel. Remove all screw covers with a sharp object.
replace-damaged-lcd-screen-01

STEP 2.

Carefully separate the top part of the LCD screen bezel from the display cover.

Continue removing the bezel.
replace-damaged-lcd-screen-02

STEP 3.

The LCD screen bezel has been removed.
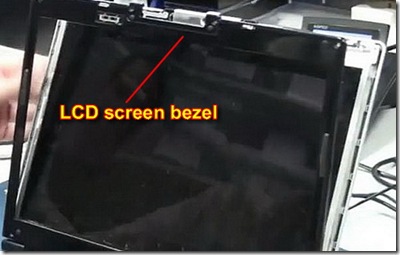
replace-damaged-lcd-screen-03 The screen inverter is mounted below the LCD screen. It’s not necessary to remove the LCD screen in order to replace the inverter. Simply disconnect cables from both sides of the inverter and replace the failed inverter with a new one if needed.
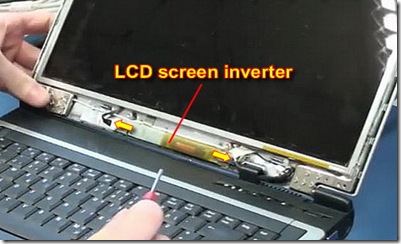
replace-damaged-lcd-screen-05

STEP 4.

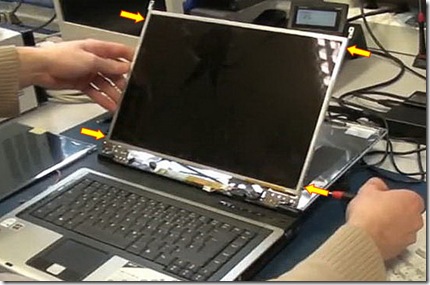
Remove all screws securing both display hinges.

In some models, there could be two more screws securing the LCD screen on the top of the display assembly (on the left and right sides from the web camera).
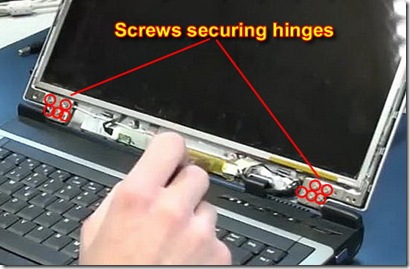
replace-damaged-lcd-screen-06

STEP 5.

If you didn’t remove screen inverter in the step 3, then you’ll have to disconnect one cable from the right side of the inverter. This is the LCD screen backlight lamp cable.
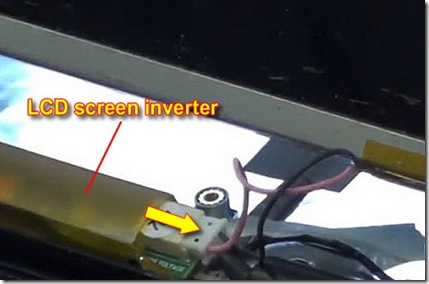
replace-damaged-lcd-screen-07

STEP 6.

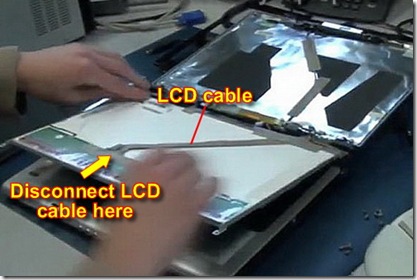
Carefully separate the LCD screen from the display cover and access the back side of the screen.

Disconnect the video cable from the LCD screen.
replace-damaged-lcd-screen-08

STEP 7.

Remove four screws securing the LCD screen to the hinge brackets. There are two screws on each side of the screen.

Now you can remove the damaged or failed LCD screen and replace it with a new screen.

You can search for a new LCD screen for Acer Aspire 5670 here and Acer Aspire 5620 here.
replace-damaged-lcd-screen-09

You can watch a video tutorial made by SparePartWorld.com here or see video below

Static electricity can kill your laptop. I recommend wearing an anti-static wrist strap while working with internal parts of your laptop.

If you find this article useful, please consider making a donation to the author. By clicking on the ad. Thank you!
SELENGKAPNYA >>
Sign up for PayPal and start accepting credit card payments instantly.